
Connecting To Your Pwnagotchi
Preparation
In order to make the first connection to your Pwnagotchi we need to prepare your computer to know how to locate your Pwnagotchi. It supports OTG, which requires a data USB cable.You now have an SD card with Pwnagotchi flashed onto it, put the SD card in the appropriate slot of your Raspberry Pi. If you have a Pi0W or Pi02W connect the micro USB side to the port closest to your HDMI port, and insert the USB-A side into your computer. Your pwn should be in manual mode.
Windows RNDIS driver
Download and unpack/zip the following Download.
In your Device Manager look for the following connection (COMx) with your RPi connected:

It may also be identified as an unknown USB device or something similar. When you disconnect the RPi the device should also disappear from the list, it is just a double check for the right connection. Now that you have the correct connection, right click it and select Update driver and select Browse computer and go to folder containing the driver you downloaded in the beginning. It should be recognized as follows:

Assigning interface IP and Internet sharing
Open Control Panel > Network and Internet > View network status and tasks > Change Adapter Settings.
Right click the device with the sub-title 'USB Ethernet/RNDIS Gadget ##' > Properties > Double click 'TCP/IPv4' and configure like below
IP: 10.0.0.1
Subnet: 255.255.255.0
Press OK and close the remaining menus.
To share internet to Pwnagotchi, open the control panel menu as above. Select your main internet adapter (Wifi/Ethernet) right click, properties. Open the sharing tab at the top of the menu, enable the top tick button and select the new Ethernet adapter that Pwnagotchi is using.
Press OK and close the remaining menus.
Connecting
We will use SSH
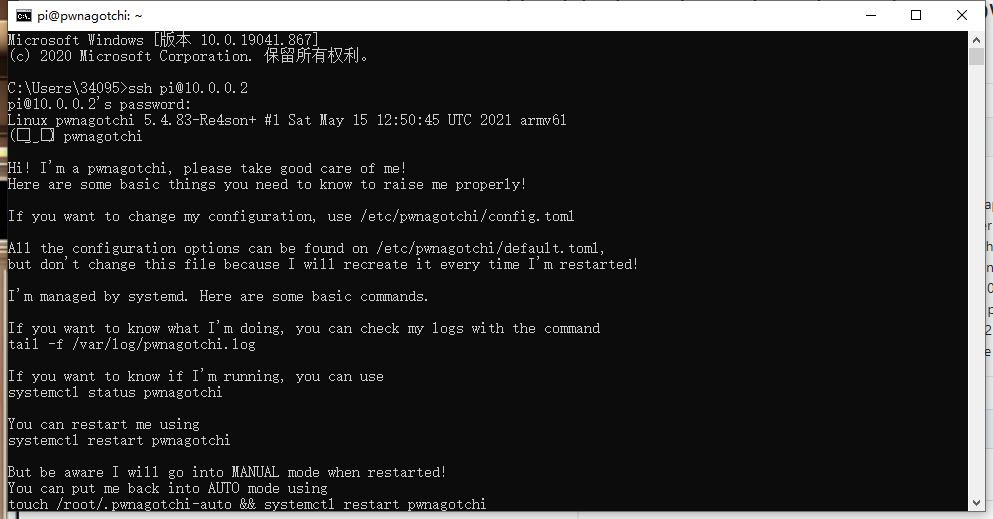
Connect to your Pwnagotchi with SSH
Default credentials are: pi/raspberry
Windows
- Open cmd.exe or a PowerShell session.
- type
ssh <username>@10.0.0.2,<username>should be changed for either default username or the username you set in RPi Imager - Confirm the security message by entering
yes - Enter the default password or the password you set in RPi Imager
If you are using a Pi4/5 and are connected with an ethernet cable, you can look up your device's IP and connect like this:
ssh <username>@<IP_of_your_pwn> or ssh <username>@pwnagotchi.lan
It will show a security message which you can confirm by typing yes.
And then enter your password.
Linux
- Open a terminal session
- type
ssh <username>@10.0.0.2,<username>should be changed for either default username or the username you set in RPi Imager - Confirm the security message by entering
yes - Enter the default password or the password you set in RPi Imager
If you are using a Pi4/5 and are connected with an ethernet cable, you can look up your device's IP and connect like this:
ssh <username>@<IP_of_your_pwn> or ssh <username>@pwnagotchi.lan
It will show a security message which you can confirm by typing yes.
And then enter your password.
MacOS
- Open Terminal app
- type
ssh <username>@10.0.0.2,<username>should be changed for either default username or the username you set in RPi Imager - Confirm the security message by entering
yes - Enter the default password or the password you set in RPi Imager
If you are using a Pi4/5 and are connected with an ethernet cable, you can look up your device's IP and connect like this:
ssh <username>@<IP_of_your_pwn> or ssh <username>@pwnagotchi.lan
It will show a security message which you can confirm by typing yes.
And then enter your password.